
Is Unscathed RNG combat turn-based?
Public analysis describes the combat loop as turn-based Aura fights built around Normal and Critical skills. Verify current UI details in-game before writing exact formula math.

Unscathed RNG combat guide covers Aura Normal skills, Critical skills, Story Mode fights, world bosses, PvP basics, and upgrade checkpoints safely.
Use the rotation notes below to compare Normal skills, Critical burst, Story walls, world boss prep, and Dojo PvP safely.
~12 min read

This Unscathed RNG combat guide explains the practical fight loop behind Auras: read your kit, use Normal skills for reliable turns, save Critical skills for burst windows, then upgrade before pushing Story Mode, world bosses, or Dojo PvP. Public analysis describes Unscathed RNG as a turn-based Aura battler where Normal and Critical skills are the core actions, but exact values can change or conflict across community sources.
The important caution is Critical accuracy. Some community notes report many Critical skills as 1x damage at 70% accuracy, especially in sample Aura rows such as Fallen and Titan's Awakening. This page treats that as community_reported / verify in-game, not as a final calculator value. Use the rotation rules below to make better decisions while the exact damage formula, enemy HP, and PvP tuning remain unconfirmed.
| Fast fact | Safe answer |
|---|---|
| Combat model | Turn-based Aura combat with Normal skills and Critical skills in public analysis. |
| Critical accuracy | 70% is a community-reported value for several Critical examples; verify before using it as math. |
| Best first combat source | Use Tier List for combat ranking and Auras for kit fields. |
| PvE route | Story Mode and world bosses test whether your Aura, skill tree, Gems, Traits, and potions are ready. |
| PvP route | Dojo PvP is confirmed in the broader game loop, but matchup rules and best builds need live testing. |
| Data stance | community_verified / possibly_outdated for skills, odds, accuracy, and enemy behavior unless captured in-game. |
Combat starts with the Aura you bring into the fight. Rolling gives you a name and rarity, but fighting depends on the actual kit: element, Normal skill, Critical skill, sell EXP, and any current tooltip values. That is why an impressive Aura name is not enough. A player who understands the kit can use a modest full-kit Aura better than a player who only chases the rarest text in the inventory.
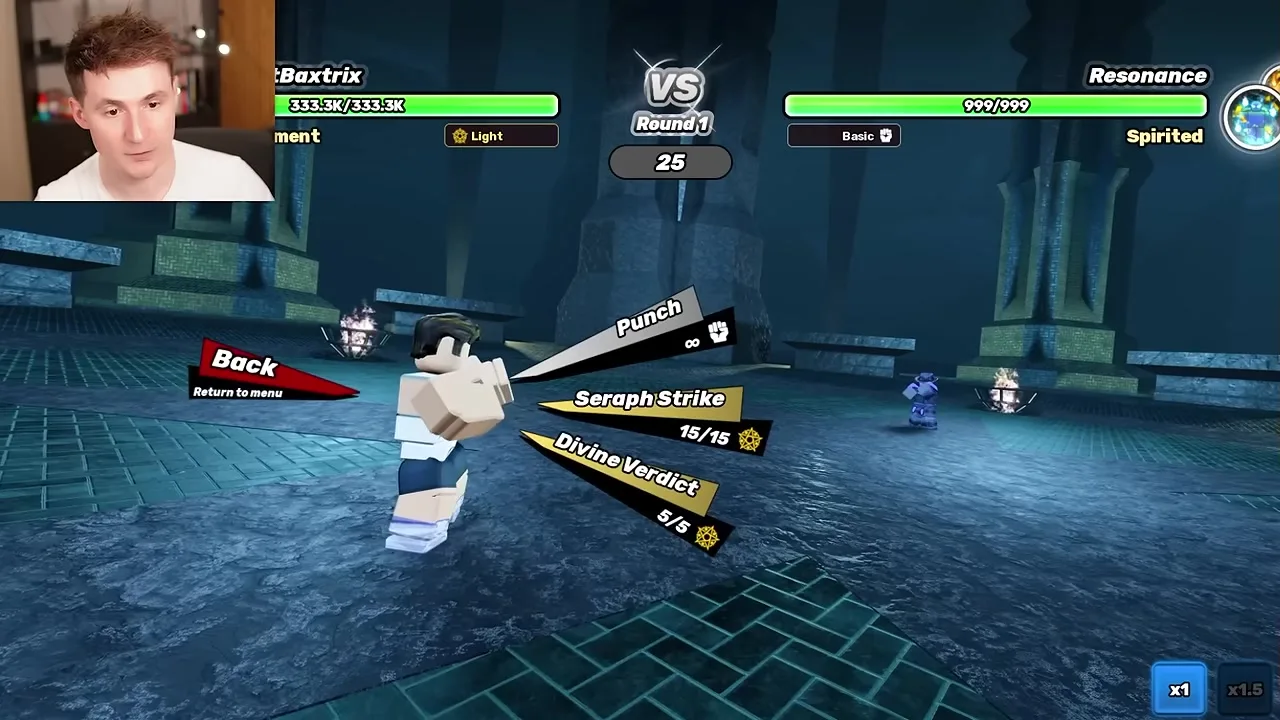
Public notes describe the fight loop as turn-based. That means every action has opportunity cost. A Normal skill is usually the stabilizer: it gives you repeatable damage, lets you learn enemy pressure, and keeps the fight moving even when the big hit is not ready. A Critical skill is the swing: it can finish a dangerous target, shorten a boss attempt, or decide a PvP exchange, but it should be treated as a probability-dependent action until its accuracy and damage are verified in the current client.
| Combat layer | What it answers | Where to verify |
|---|---|---|
| Aura kit | What skill names, element, and combat tier you are using. | Auras and current in-game tooltip. |
| Normal skill | Your reliable turn-by-turn action. | Tooltip damage, PP, cooldown, and practical fight test. |
| Critical skill | Your burst action with reported accuracy risk. | Tooltip text plus repeated hits/misses if 70% is still claimed. |
| Permanent upgrades | Whether the account is underbuilt for the target fight. | Skill Tree, Gems, and Traits. |
| Temporary boosts | Whether a potion window is worth spending before a hard fight. | Potions and Luck Guide. |
In a pure action fight, a missed button can be corrected immediately. In a turn-based fight, a weak opening turn can define the whole attempt. Start each new enemy by asking what the fight is testing: damage, survival, burst timing, or whether your build is simply too low. That question prevents wasted repeats.
Normal skills are the baseline that keeps a build honest. If the Normal skill cannot handle routine pressure, a flashy Critical skill will not save every attempt. Test the Normal skill first, then decide where the Critical belongs in the rotation.
Once the turn model is clear, the next question is how to rotate those two skill types without pretending every Critical is guaranteed.
Use a rotation rule instead of pressing the highest-looking option every time. Open with the safest Normal skill unless the enemy has a confirmed low-risk burst window. Watch whether the target survives, how much incoming pressure you take, and whether the Critical skill would actually change the fight. If the Critical is reported at 70% accuracy, the decision is not "always press it"; the decision is "does a miss still leave me alive?"
This matters most when you are comparing two Auras. Flame, Geoshade, Ascend, Soulbound, Fallen, and Aqua appear in the public S group because they have complete public kits and strong combat placement. But the best kit for your account still depends on how often your reliable turn wins the fight, how much a Critical miss punishes you, and whether your upgrades support the element.
| Situation | Combat action | Why it works |
|---|---|---|
| Opening turn | Use the safest Normal skill or setup action | Confirm enemy pressure before spending the highest-value Critical option. |
| Critical available | Use it when the fight rewards burst or a quick finish | Community notes often report 1x damage and 70% accuracy for Critical skills, but verify the current tooltip before calculating. |
| Enemy survives burst | Return to Normal skill and watch cooldown, PP, or turn economy | A missed or resisted Critical can leave the build behind if the Normal plan is weak. |
| Story wall | Pause the fight loop and upgrade permanent systems | Open Story Mode, Skill Tree, and Gems before repeating the same loss. |
| Dojo PvP test | Run short repeatable matches after PvE basics work | PvP rewards timing and matchup knowledge; it is not the first place to learn the combat kit. |
The 70% Critical accuracy claim is useful because it changes behavior. It tells you not to assume the burst lands. It does not tell you the final expected DPS, boss kill time, or PvP win rate. For now, write it beside Critical skills as "reported, verify" and keep your rotation resilient enough to survive a miss.
A rotation that clears one early enemy may fail against a later Act, a world boss, or a PvP opponent. Keep notes simple: Aura used, Normal result, Critical result, whether a miss caused the loss, and which upgrade you changed before the next attempt. The next section turns those notes into Aura kit decisions.
Matched by build plan, shared topics, and guide progression — not random related links.
The safest combat decision is to separate kit completeness from rarity. Punch-style starter rows can carry the first steps, but they should not be treated as late-game proof just because a name sounds powerful. Named Normal skills are better for early testing, while full-kit Auras deserve real investment because they can answer both reliable damage and burst questions.
Use the table below as a combat planning map. It does not replace the full Aura lookup, and it does not claim every B-tier rare Aura is weaker for every future patch. It only tells you how to treat each kit group when you are deciding whether to equip, test, save, or sell.
| Kit group | Public combat shape | Examples | Safe action |
|---|---|---|---|
| Punch-style starter rows | Normal-only or no separate Critical listed | Common Aura, Uncommon Aura, Rare Aura, Epic Aura, Legendary Aura | Use as early bridges or XP decisions after backup; do not treat names as proof of combat strength. |
| Named Normal, Critical not listed | Better early feel but incomplete public kit | Brushed, Nunchucks, Spartan, Dreamer, Flow, Spark, Sprout | Test in simple fights, then compare against full kits before investing. |
| Full-kit S/A group | Named Normal and named Critical | Flame, Geoshade, Ascend, Soulbound, Fallen, Aqua, Nocturnal, Cupid, Luminara, Shogun's Wrath | Best public starting point for combat routing, still community_verified / possibly_outdated. |
| Rare full-kit reported group | Normal + Critical reported, exact names incomplete in local notes | Falling Crescent through Titan's Awakening B group | Keep rare one-copy pulls until current skills and update status are verified. |
A complete kit gives you a Normal plan and a Critical plan. That is why the combat tier list can value an easier full-kit Aura above a much rarer row with missing public skill detail. When the fight matters, test what the Aura actually does instead of ranking by name drama.
Do not sell rare one-copy pulls such as Titan's Awakening just because a public combat tier currently places them below S. The combat guide is about winning fights, not deleting collection value. Save rare copies, test exact tooltips, and only convert duplicates when the decision is reversible enough for your account.
After the Aura kit is chosen, the next question is where to test it: Story, bosses, or PvP.
Move into Story Mode when your build has a reason to be tested. That means a usable Aura, permanent upgrades spent, a basic understanding of Normal and Critical timing, and enough resource discipline that a failed fight turns into an upgrade plan instead of a rage repeat. Story is valuable because it exposes the gap between "my Aura is rare" and "my build can clear the next wall."
World bosses belong one step later. Public materials confirm world bosses as part of the progression loop, but specific spawn cycles, boss HP, and drop tables are not stable enough for this page to publish as facts. Treat bosses as a verification target: capture the boss name, visible mechanics, rewards, and your build, but do not invent kill-time math until HP and damage values are measured.
| Test target | Bring this first | Do not claim yet |
|---|---|---|
| Early Story fight | A practical Aura with repeatable Normal damage and at least one upgrade pass. | Exact enemy HP unless the current fight UI shows it and you record it. |
| Later Story wall | Full-kit Aura, skill tree check, Gem or Trait alignment, and potion plan. | Universal recommended Aura for every account. |
| World boss | Verified boss name, visible mechanics, and a build note. | 45-minute spawn loops, fixed drop rates, or Boss HP without direct capture. |
| Farm repeat | One fight you can repeat to compare Normal and Critical results. | Expected DPS from a single lucky run. |
If the fight fails after a fair attempt, write down why. Did the Normal skill feel too weak? Did the Critical miss at the wrong time? Did you enter without skill points, Gems, or Traits aligned? That note tells you which guide to open next instead of repeating the same bad attempt.
Boss HP is the easiest number to fake and the hardest number to keep correct after updates. Until a later capture pass records current boss UI and damage logs, this site should describe boss prep behavior rather than publish invented HP rows.
Once PvE testing is under control, Dojo PvP becomes a separate matchup problem.
Dojo PvP is not just Story Mode with another player standing there. PvE teaches your rotation, but PvP adds matchup timing, burst baiting, and the risk that another player understands your kit. A build that clears an early Act can still lose in Dojo if it relies on one Critical hit landing or if the Normal skill gives the opponent too many safe turns.
Start with short tests. Bring your best full-kit Aura, note whether Normal pressure matters, and only then test Critical timing. If the public 70% Critical accuracy claim applies, PvP punishes the miss more than routine PvE because the opponent can answer immediately. That is why PvP builds should be tested, not copied from a tier row with no matchup context.
The best PvP habit is consistency. If your plan only works when the Critical lands on the first try, it may be fun but fragile. A stronger Dojo plan has reliable Normal pressure, a reason to spend Critical, and enough upgrades that one miss does not end the whole match.
Dojo performance is one lens. Collection value, rarity, and future balance value are different lenses. Do not sell a rare Aura because it lost one PvP test, and do not call an Aura best overall because it won one Dojo match.
The final section lists the combat data that still needs capture before this guide can become a calculator.
This page is intentionally conservative because combat pages age badly when they publish confident numbers without current evidence. The next media pass should capture Aura tooltips, Normal and Critical descriptions, Critical accuracy text, a small repeated-hit sample, Story enemy names, visible boss UI, and Dojo rules. That dataset is enough to turn this guide from routing advice into a damage model later.
Until then, the right user-facing promise is smaller and more useful: equip a complete kit, rotate Normal and Critical skills with accuracy risk in mind, upgrade after failed walls, and treat PvE, bosses, and PvP as different tests.
| Data needed | Why it matters | Status |
|---|---|---|
| Current Critical accuracy text | Confirms whether the reported 70% value still applies. | community_reported / verify |
| Normal and Critical tooltip values | Prevents copied skill names from becoming fake damage math. | partial public data |
| Enemy HP and resistance | Required for expected damage and kill-time calculators. | do not publish until captured |
| World boss spawn and drop rules | Needed before trackers or farming tables are reliable. | conflicting public notes |
| Dojo rules and rewards | Needed before PvP build rankings are fair. | confirmed system, details TBA |
Public analysis describes the combat loop as turn-based Aura fights built around Normal and Critical skills. Verify current UI details in-game before writing exact formula math.
No. Treat 70% as a community-reported value for several Critical examples until the current in-game tooltip or repeated testing confirms it.
Start with full-kit Auras from the tier list, then check exact skill fields on Auras before selling rare pulls.
Yes. Story Mode is the cleaner place to learn your Normal and Critical rotation before matchup pressure changes the result.
No. Boss HP is intentionally omitted until current in-game captures verify the values.
Matched by build plan, shared topics, and guide progression — not random related links.